Next SPFx React Control is FileTypeIcon Control. With this control you can show a message that the web part still has to be configured.
We can start with new SPFx project:
yo @microsoft/sharepoint
Select WebPart as client-side component.
After project is created, install next dependency to your project. This is for SPFx React Controls.
npm install @pnp/spfx-controls-react --save --save-exact
Open project within Visual Studio Code.
code .
Go to config/config.json file and add the following line to the localizedResources property:
"ControlStrings": "./node_modules/@pnp/spfx-controls-react/lib/loc/{locale}.js"
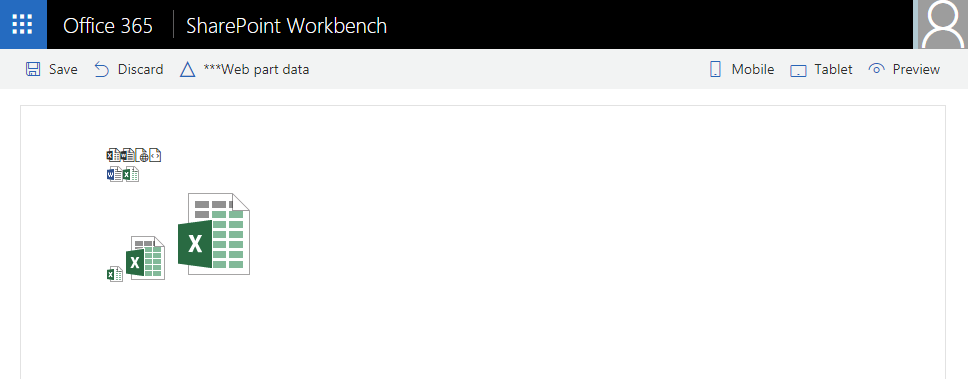
All you need to do is to import classes from FileTypeIcon and add FileTypeIcon elements to render method inside your React Component class.
import { FileTypeIcon, ApplicationType, IconType, ImageSize } from "@pnp/spfx-controls-react/lib/FileTypeIcon";
export default class HelloWorld extends React.Component<IHelloWorldProps, {}> {
  public render(): React.ReactElement<IHelloWorldProps> {
    return (
      <div>
        <FileTypeIcon type={IconType.font} application={ApplicationType.Excel} />
        <FileTypeIcon type={IconType.font} path="https://contoso.sharepoint.com/documents/filename.docx" />
        <FileTypeIcon type={IconType.font} application={ApplicationType.ASPX} />
        <FileTypeIcon type={IconType.font} application={ApplicationType.Code} />
        <br />
        <FileTypeIcon type={IconType.image} application={ApplicationType.Word} />
        <FileTypeIcon type={IconType.image} path="https://contoso.sharepoint.com/documents/filename.xlsx" />
        <br />
        <FileTypeIcon type={IconType.image} size={ImageSize.small} application={ApplicationType.Excel} />
        <FileTypeIcon type={IconType.image} size={ImageSize.medium} application={ApplicationType.Excel} />
        <FileTypeIcon type={IconType.image} size={ImageSize.large} application={ApplicationType.Excel} />
      </div>
    );
  }
}
Cheers!
Gašper Rupnik
{End.}


Leave a comment